Wednesday, December 29, 2010

Tutorial - Make your own chip board album

I wanted to make something special for my 2 big sisters this Christmas. My sisters are my world... Having a busy single mama, they were the ones who answered my questions and wiped my tears growing up. They taught me things, gave me advice, and have always been there for me to pick me up when I was down.

It's funny, because both of my sisters HATE to cook. They just have no interest in learning and couldn't be bothered. My mom always says I'm the one with the cooking gene. Regardless, I'm always trying to get them to try it out and encouraging them to make something. Cooking is so FUN! So I decided to make them a book of recipes. Not just any recipes, but our family recipes. The same side dishes that my mama has been making every holiday for as far back as I can remember (the ones I have finally mastered!). Sweet potato casserole, fruit salad, mashed potatoes, stuffing, deviled eggs, and potato salad. One day in the (far, FAR) future when my mom is no longer with us, I want them to be able to make these dishes and think of a time we were all together, sitting around the table and talking about horribly inappropriate things.

I have always loved chipboard albums, but they intimidate me. So much creativity and detail goes into making them and I never thought I could pull one off, much less two of them! Until a few months ago when my best friend made one for her baby girl and I saw the process step by step. I thought, I could do that! And although it was risky, I wanted to try it out for the first time and give them as gifts to my sisters. So here's a step by step tutorial created by me, for you. Don't be intimidated. Make one! They make a great gift for any occasion, or you can keep it for yourself. You can fill them with family photos, romantic keepsakes, or recipes like I did. There's so many options!


Chip board album tutorial. (Excuse the crappy point and shoot photos. As usual.)


You will need:

  • pieces of chip board in your desired size (found at michaels or scrapbooking stores)
  • scissors
  • glue stick (I needed 2)
  • hole punch
  • nail file or emery board
  • scrapbook paper
  • ribbon
  • metal rings that open and close (found at staples or office supply stores)
  • distressing ink (optional)
  • desired embellishments and/or photos


Step 1.

I found large square chip board pieces (looks like card board) at my local scrapbooking shop for about 30 cents each and bought 6 of them. Using scissors I measured and cut them into my desired size. Each piece would be 1 page of the album (and don't forget a front and back page) You can buy pre-made chip board albums ready to decorate, but they tend to be overpriced when it's so easy to make yourself.


Step 2.

Once you have your pieces all cut you will need to choose your scrapbook paper. Because I was giving these as Christmas gifts, I decided to go with holiday themed paper. It's easiest to choose these all ahead of time and arrange them in the order of your pages. This was easily my favorite part. It's like choosing outfits for a fashion show; everything must be cohesive. Make sure to have paper for both the front and back of each piece of chip board.


Step 3.

After your papers have been chosen and arranged you will need to trace the pieces of chipboard on each piece of paper and cut them out. If your paper has a white back (versus double sided paper) I would use that side to trace so you don't have to worry about erasing pencil lines. Try to get as exact as possible. This will make future steps easier.


Step 4.

Once you have your chip board pages and scrapbook paper cut out, it's time to glue! Using a glue stick, cover the entire piece of chip board with glue (use a generous amount), line up the scrapbook paper and stick it on! Rub your hands on the outside of the paper to secure it. Once it's on, you shouldn't be able to move the paper in any direction. Glue pieces of paper on both the front and back of each page.


Step 5.

Let your pages dry for 15-20 minutes. Then get your nail file or emery board and file each side of each page until the paper is completely flesh with the chip board and the sides are smooth. If you notice the paper coming off during this step just add a little more glue to that section and press down until secure. At this point you can choose to distress the edges of your pages or leave them as is. I actually did one of each because I couldn't decide which one I liked better. I don't have photos of the distressed album, but below is a photo of a distressed gift tag from Brown Paper Packages (she's the distressing master!) in case you're not familiar with the process.


Step 6.

So now all your pages are done! Next you're going to punch holes on the left hand side of each page. Make sure to line them up and mark where you want the holes to be so they match up. You can do one hole in the top corner, 2 holes on the top/bottom, or 3 holes going down as I did. It's completely up to you! Then put your metal rings through the holes and tie a little piece of ribbon around each one. Normally I like the busy, cluttered look for this type of thing and would do 3 pieces of ribbon for each ring, but because I knew these were recipe books I only did one piece of ribbon per ring to be practical.


Step 7.

This is your final step! It's time to embellish! There is no right or wrong way to do this... it's all personal preference! As I said before, you can put pictures, keepsakes, or recipes (or anything really) on your pages. Then decorate! I found rhinestones, stickers, scrapbook embellishments, buttons, and ribbons and just went to town on each page! Be creative and try things out! If you get stuck you can always look at other albums for inspiration (try Etsy for photos).


So there you have it! I think it turned out great for my first one! And most importantly, my sisters both loved them. I'm planning on making another one soon with pictures of Cayden. I'm thinking a nautical theme to go with his nursery. Really, the possibilities are endless!

If you end up making one of these (which I hope you do!) please, share pictures! I would love to see what creations you come up with!


Monday, December 27, 2010

First Christmas.

How was everyone's Christmas? Are you sad it's all over? I know I am! We were celebrating Cayden's FIRST Christmas over here and it was wonderful! Christmas morning we waited for Cayden to wake up and then spent the morning opening a few presents at home, just the 3 of us. Then we headed on over to Mando's parent's house and opened more presents with them. We finished off the day at my mom's house opening even MORE presents and eating a delicious Christmas dinner. It was perfect. Cayden did great and was even able to rip the wrapping paper off a few gifts (even if he did try to eat it afterward)! Everyone loved my photo blocks and baked goods (I'll post about this later) and I think I've gained about 5 lbs from eating so many sweets!

Yesterday we took all of the Christmas stuff down, including the tree. Normally we leave it up until after the New Year but it seems Cayden's new toys have taken over our tiny little home and I was feeling a bit claustrophobic. It feels good to have my house back!

I'm still not quite sure what we'll be doing for the New Year. I kind of want to stay home with the baby and spend it with him, but I know Mando is itching to go out. We haven't gone out alone as a couple since before Cayden was born. I think I still need more time, but we'll see! I can't believe my baby boy is 5 months already! Next month we'll be feeding him solids! I am excited, but a little sad as well. He's growing so fast!

Now that the holidays are over I won't be so busy hopefully. I'm taking this time to start fresh, and plan for the future. We'll be moving in 2 months and I still need to find a new place! I'm also plotting ways to bring in some extra income now that I'm a stay at home mom. I'm excited to see what the future will bring!


Christmas Eve.


Waking up Christmas morning.


He's up!


For me?


Opening presents all on his own!


What could it be?


The best present a girl could ask for!


This one was bigger than he was!


Turns out, he loves his bouncer!


Merry Christmas Cayden!


Monday, December 20, 2010

Recipe - Dark Chocolate Peppermint Bark

All week I've been busy putting the finishing touches on my handmade Christmas gifts and doing the prep for my Christmas baking. Usually when I'm baking for a special occasion I like to do a test run the week before to make sure it tastes good (especially if I'm making it for the first time), that way I can make any adjustments to the recipe if needed. With the help of my Twitter friends I figured out what baked goods I want to put in my Christmas tins that I'll be giving as gifts. I finally decided on peppermint bark, gingerbread cookies, marshmallow fudge, and chocolate dipped candy canes.

This weekend I tried out the peppermint bark and it was definitely a winner! This recipe is ridiculously simple, inexpensive to make, and ends up looking gorgeous! Traditional peppermint bark is made with white chocolate but I love the look and flavor of dark chocolate so I went with that instead. I am still deciding if I want to do white chocolate swirls in my next batch. Thoughts?

And without further ado...

Dark Chocolate Peppermint Bark

Ingredients:
  • 12 oz quality dark chocolate. I used Ghiradelli's dark chocolate squares.
  • 7 full sized candy canes
  • 1/2 teaspoon peppermint extract

First thing first, cover a cookie sheet with wax paper. Then you'll need to crush your candy canes. You can use a food processor, but be VERY careful! You don't want to grind these into a fine powder; you want chunky! I ended up just using a meat mallet and a cutting board. It got a little messy but worked fine for me.

Next step, melt your chocolate. If you bought chocolate squares you'll want to break them down into small pices so they melt easier. Chocolate chips can just be poured in. You can use a microwave to melt (following the heating instructions on the package, usually 30 seconds or so) but make sure you stir frequently and don't over heat. I prefer to use a double broiler (fancy name for one pot filled with boiling water with another pot or a bowl resting on top) because it's easier to control and I can stir constantly.

Once your chocolate is melted stir in the peppermint extract. Then you're going to pour the melted chocolate onto the cookie sheet spreading it evenly using a wooden spoon. It may be easier to have a helper pour while you spread and you can make it as thick or thin as you like it. Once the chocolate is spread out evenly out to the corners of the cookie sheet you pour the crushed candy canes on top. Make sure you work slow so that you don't run out of the mixture before getting to the other side! The candy canes should cover every inch of chocolate.

Using your fingers, gently press in the candy cane mixture into the chocolate. Then place your cookie sheet in the freezer for approximately 10 minutes. When the chocolate is hard and cold it's time to break it up! You can make various sizes jagged pieces like I did, or make even square pieces. It's completely up to you! Then place them in whatever packaging you like or if you're making it for yourself just store in the fridge in an airtight container!

If you're making this as gifts for several people I would triple the recipe. It keeps well for several days if stored correctly so you can make it a few days in advance. Enjoy!


Tuesday, December 14, 2010

Friday Favorites: Matroyshka love.

I'm very proud of my Russian heritage. Although I am basically a European mutt, I identify the most with my Russian roots. My great-grandfather, Sasha Voliskoy, was a Russian Count and his life fascinates me. A few years back I started researching and learning everything I could about the country and I discovered Russian nesting dolls (also known as matroyshka or babushka dolls). I fell in love. Over the years I've started my own little collection of the traditional dolls and even got one tattooed on me. Today's Friday Favorites shows a little love to the matroyshka dolls found all over Etsy.


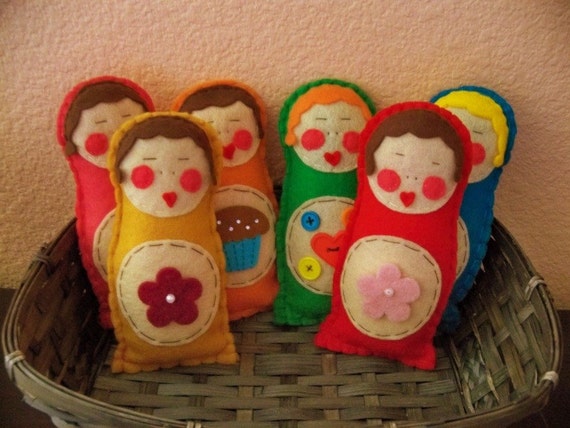
These eco-friendly matroyshka Russian dolls are hand-cut and sewn and they each come with their own embellishment. I adore the cupcake one hiding in the back.


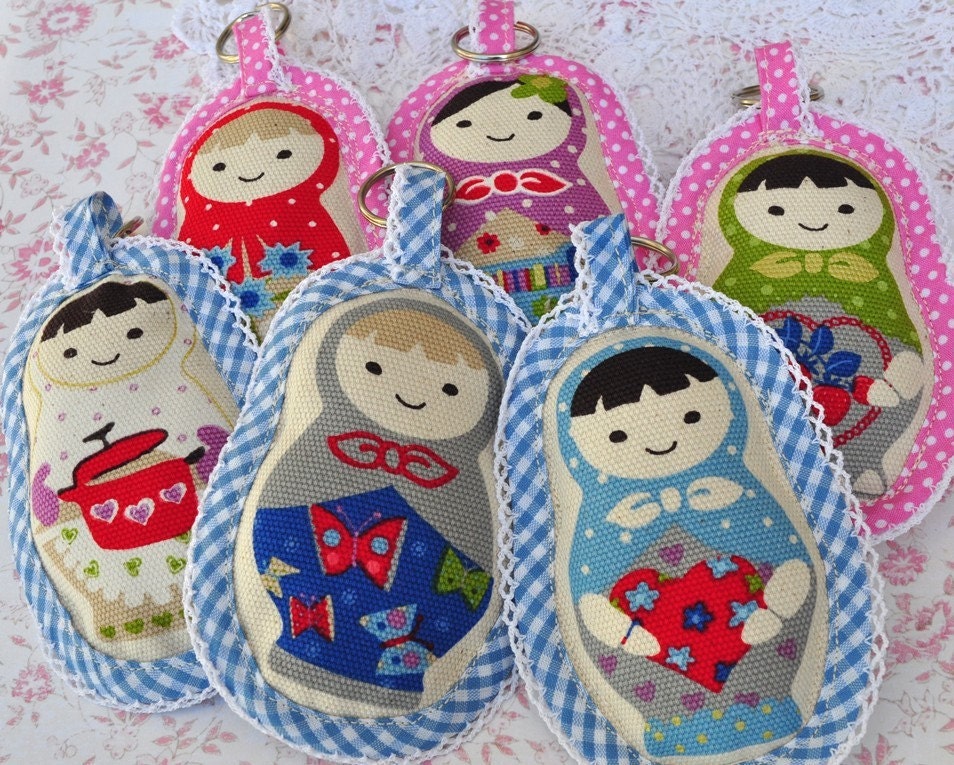
These matroyshka canvas key holders are too cute! Look at the one on the left holding a pot!


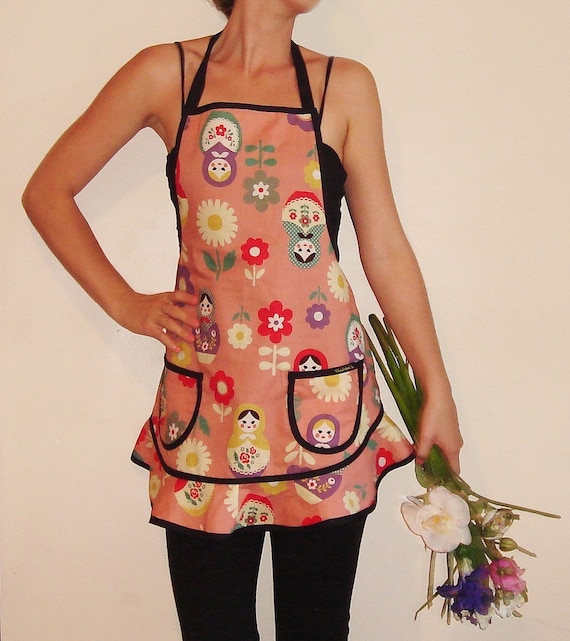
I think I need this matroyshka hostess apron. No, really.


These matroyshka doll ornaments are sure to light up any Christmas tree!


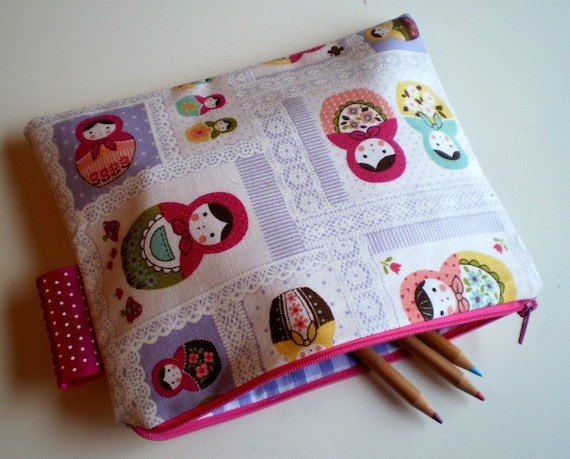
I love the detailing on this feminine Matroyshka make-up bag!


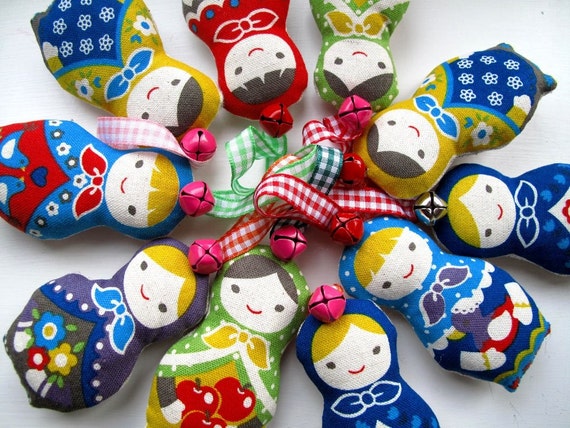
Any baby girl would love one of these matroyshka rattle dolls. They have a bell inside for a fun sound effect!

And just for fun, here's a picture of Sasha himself and my own (freshly done) matroyshka tattoo! It's still not finished yet 2 years later!


Recipe - Chai Spice Cupcakes

Back in October I met up with a few local mamas that I'm friends with on Twitter. Since we were going to a pumpkin patch we decided it would be fun to bring some snacks and drinks with us. I knew right away that I wanted to bring my chai spice cupcakes.... they are the perfect fall/winter treat and everyone always loves them! They taste just like a vanilla chai from Starbucks, but in cupcake form! What could be better?

Ever since I started making these for people I've been getting countless requests for the recipe so I wanted to finally share it with everyone! It's a super easy doctored cake mix recipe with just a few simple changes. I hope you enjoy!


Chai Spice Cupcakes

You will need:

Cake:
  • 1 box Betty Crocker vanilla cake mix
  • 1 1/2 cups water
  • 1/3 cup vegetable oil
  • 3 eggs
  • 3 TBL instant chai tea latte mix (you can find this at any grocery store in the coffee aisle)
*If you prefer to make from scratch, you can use your favorite vanilla cake recipe and just add the instant chai

Frosting:
  • 1 cup white vanilla baking chips (I use white chocolate chips because I can't find these)
  • 1 container of vanilla frosting
  • Ground cinnamon, if desired

Pre-heat oven to 350°F. Line 24 muffin cups with paper baking cups. In a large bowl beat cake ingredients with electric mixer. Divide batter evenly among muffin cups. Bake 18 to 23 minutes or until toothpick inserted in center comes out clean. Cool 10 minutes; remove from pan to cooling rack. Cool completely, about 1 hour.

In a medium bowl, microwave your vanilla/white chocolate chips for 30 seconds and stir until melted. If necessary, microwave 15 seconds longer. Stir until smooth and then cool for 5 minutes. Stir in frosting until well blended. Immediately spread or pipe frosting mixture on cupcakes and sprinkle with cinnamon!

Original recipe.

Friday, December 10, 2010

It's beginning to look a lot like Christmas...

I've been so busy trying to prepare everything for Christmas this week! I normally start getting ready for Christmas in October because handmade gifts take a lot of time and I hate rushing through things, but this year has been so busy so I haven't really started until now (and I'm slightly panicking). Most of my shopping is done, but I still have to find something for Mando and my BIL. Why are men so hard to shop for? Mando's birthday is the week before Christmas so I have to find him 2 gifts and soon. We just got our tree up this week and took Cayden to see Santa. I still have to finish top secret hand-made gifts for my 2 sisters, finish 25 photo blocks, and make a million baked goods to give as gifts on Christmas!

Speaking of which, I need help! I still need to figure out 3 Christmas desserts or candies to make. I'm making cake balls with my sister which I plan to put in Chinese take-out boxes, but I also have big round Christmas tins that I wanted to fill with a few different yummy things to hand out. I'm thinking gingerbread cookies for one layer, but I'm stuck on what else to make. I want it to scream Christmas! Maybe something peppermint? Do any of you have any adorable Christmas recipes bookmarked that you would be willing to share? I'm desperate!

Tonight I'll be making (hopefully my last) trip to Michaels to pick up some more supplies and I'm going to lock myself in the house so I can finish these projects! Sunday we are going to a fun holiday festival in my mom's neighborhood. They bring in snow, a horse drawn carriage, and the kids can meet Santa while parents sip on warm drinks. I'm really looking forward to going and spending time with my family. I also want to make some homemade hot cocoa and go on a late drive with Mando and Cayden one night this week to look at Christmas lights. We did this on our first date 2 years ago and it was so magical. I would love to do it again but with our baby asleep in the back seat. ♥


Our tree! I still need to add to it, but at least it's up!


Cayden with Santa and Mrs. Clause. He did great!


My beautiful winter baby!


Worn out after a long day.


Friday Favorites: Harry Potter.

I'll admit it, I have an obsession with Etsy. My sister first introduced the site to me a year or 2 ago and I've been hooked ever since. The sellers are so talented and I just love supporting home-businesses. Every hand-made treasure is beautiful and unique and I am continually inspired by what I see.

I've decided to start a fun little series called Fridays Favorites showing some Etsy love on my blog. I will show things that I've stumbled upon and fallen in love with and hopefully inspire some of you as well!

I wanted to dedicate my first ever Friday Favorites to Harry Potter. I am a HUGE Harry Potter fan and totally geek out on all of the unique HP themed things I find on Etsy. I cannot tell you how many times I've been tempted to empty my bank account on these treasures but for now I'll satisfy myself by sharing them with you all!


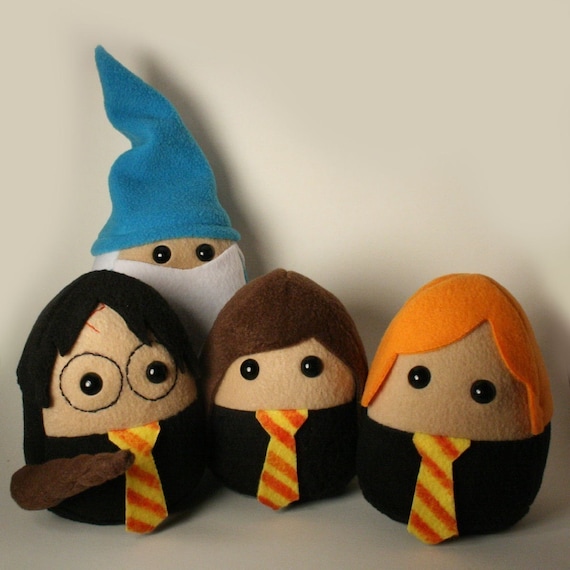
Aren't these Harry Potter Plushie Pals the cutest? I think my favorite is Dumbledore. And look at the wand in Harry's hand! Love!


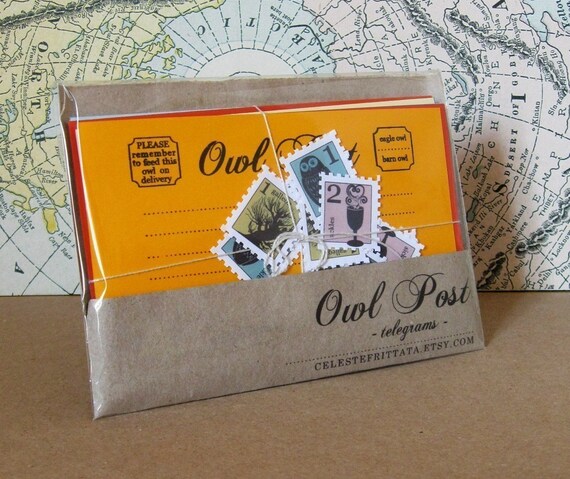
I die for this Owl Post Stationary set. Seriously. If I ever get around to planning a HP themed dinner party I will definitely find some way to incorporate these treasures.


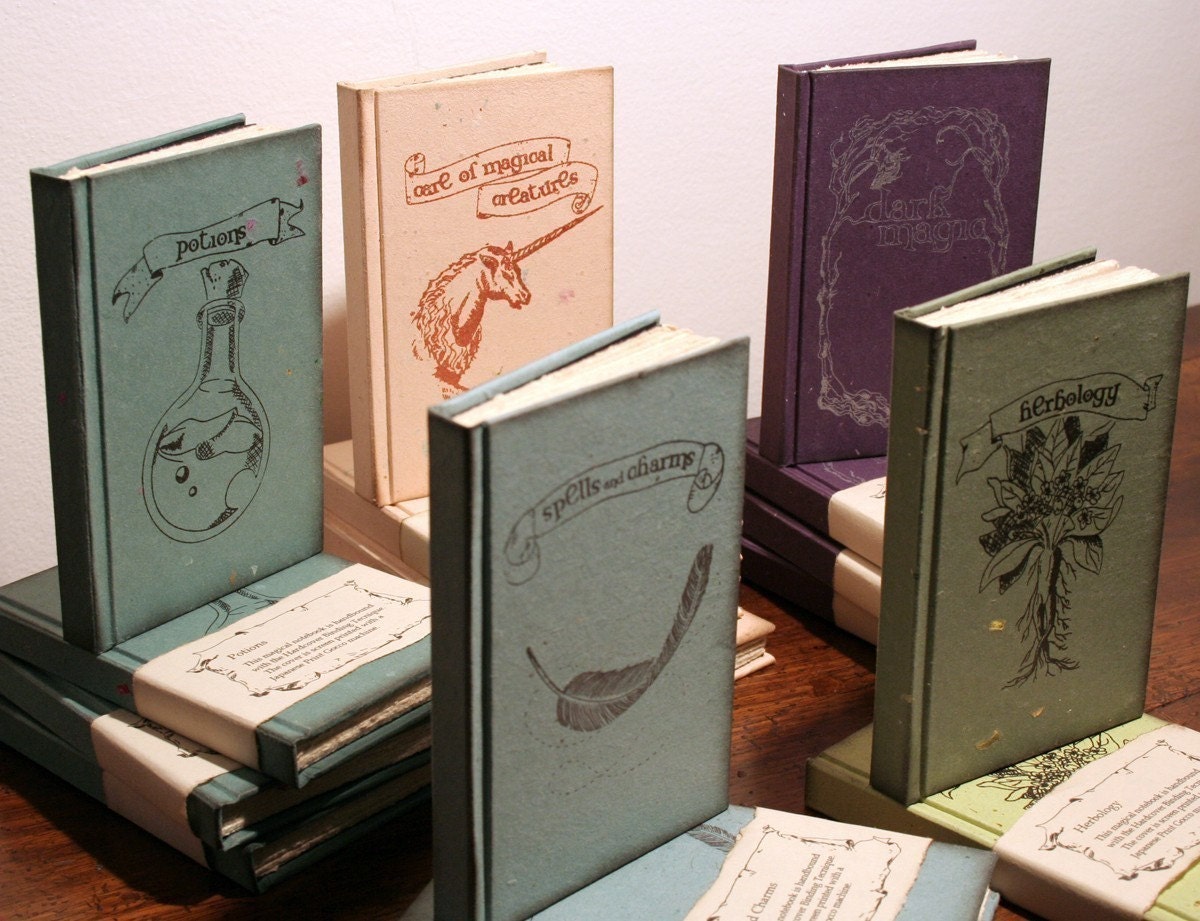
This set of Magical Notebooks is probably my favorite thing on Etsy right now. They are STUNNING hand-bound notebooks representing all of the classes at Hogwarts. The detail that went into these just amazes me and I want every single one. (Hint hint!)


Evie, the owner of this shop, custom-made me one of these Marauder's shirts in black and white (although the Gryffindor colors are rad too!) and I wore it to the Deathly Hallows premier. It is super comfy and I love showing it off!


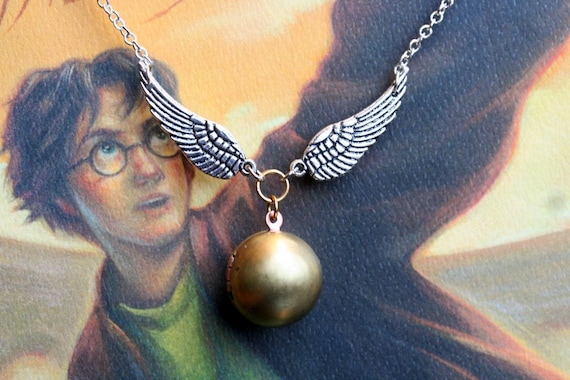
This Golden Snitch necklace brings back memories of reading all about Quidditch in The Sorcerer's Stone over 10 years ago. I don't usually wear jewelry but I would rock this in a heartbeat!

That's all I have for now! Do any of you have any fabulous Harry Potter finds? I'd love to see them all so please share!